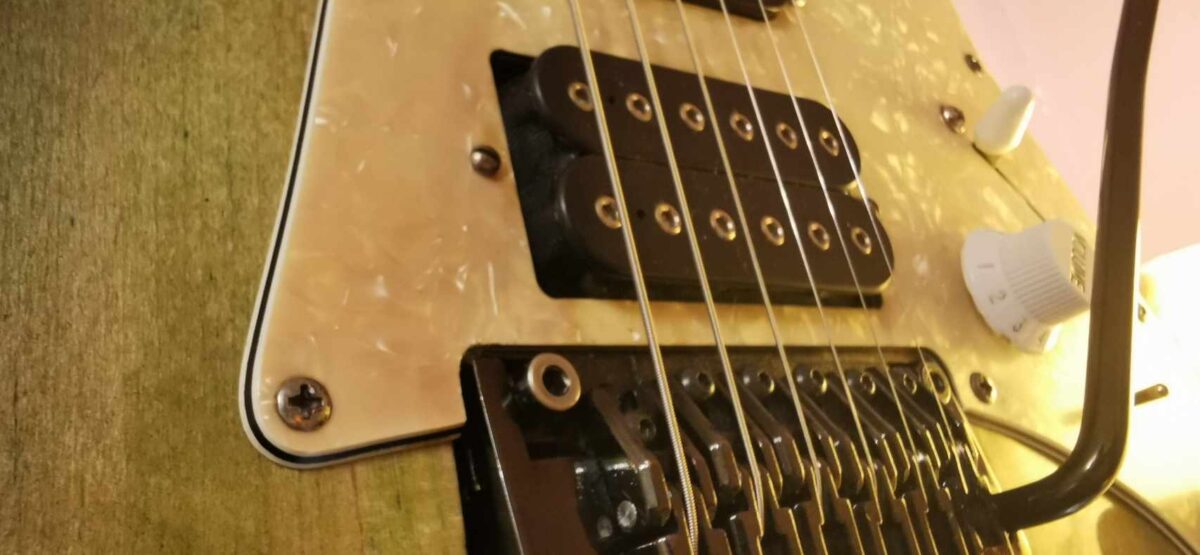
Master the Float: The Ultimate Guide to Setting Up and Maintaining an Ibanez Edge Tremolo
For decades, the Ibanez Edge has stood as one of the finest double-locking tremolo systems ever created. Manufactured by Gotoh, the Original Edge and Lo-Pro Edge are celebrated by virtuosic guitarists for their unrivaled tuning stability and buttery-smooth feel.
However, for many players, the thought of changing strings or adjusting the action on a floating bridge brings on a wave of anxiety. Because the system relies on a delicate balance of physical tension, changing one variable can throw the entire guitar out of whack.
Setting up your Ibanez Edge doesn’t require a degree in physics. By following a structured, step-by-step approach, you can banish the “floating bridge nightmare” forever and achieve a flawless setup.
Before you begin, gather these essential tools:
Allen Keys (Hex Wrenches): 1.5 mm, 2.0 mm, 3.0 mm, and 4.0 mm.
Screwdriver: A standard No. 2 Phillips screwdriver.
Precision Tuner: A reliable electronic chromatic tuner.
Step 1: Prepping the Hardware
Chaos often ensues when players try to adjust a locking system that is already locked down.
Release the Headstock: Use your 3 mm hex wrench to remove the three locking pads at the headstock nut. Place them somewhere safe.
Center the Fine Tuners: Look at the small fine-tuning knobs on the bridge. Spin them until they are right in the middle of their threading range. This guarantees you will have plenty of room to micro-tune up or down after the nut is locked back up.
Step 2: The Magic of “Blocking” the Bridge
If you try to tune a completely free-floating bridge from scratch, it will turn into a frustrating game of tug-of-war. Tuning one string pulls the bridge forward, dropping the pitch of the other five strings.
To bypass this headache entirely, you must temporarily turn your floating bridge into a hardtail:
Remove the plastic spring-cavity cover on the back of the guitar.
Pull up slightly on the tremolo arm and insert your temporary bridge block into the cavity space behind the sustain block.
Slowly let go of the arm. The block should wedge tightly, freezing the bridge in place.
The Golden Rule: Look at the side profile of the bridge. The knife-edge insert line (stamped directly into the side of the steel baseplate) must sit exactly parallel to the top surface of the guitar body. If it is tilting forward or backward, adjust the thickness of your wedge block until the bridge sits perfectly level.
Step 3: Restringing
With the bridge mechanically locked into a level position, you can now change your strings without the system fighting back.
Replace your strings one by one. Cut off the ball-ends of the new strings before inserting them into the saddle blocks, and lock them down tightly using the 3 mm wrench on the rear saddle bolts.
Wind the strings onto the headstock pegs and tune the guitar to your exact target pitch using your normal machine heads.
Stitch and stretch the strings thoroughly, re-tuning as you go. Because the bridge cannot move, the guitar will behave just like a fixed-bridge instrument and stabilize rapidly.
Step 4: Balancing the Spring Tension
Now comes the crucial moment: transferring the physical load from your temporary block over to the guitar’s rear extension springs.
With the guitar perfectly in tune, look at the block in the rear cavity.
If the block is stuck tight and won’t budge, the strings are pulling harder than the springs. Use your Phillips screwdriver to tighten the two claw screws (clockwise) into the wood body. This pulls the springs tighter.
If the block falls out easily or feels loose, the springs are pulling harder than the strings. Loosen the claw screws (counter-clockwise).
The Sweet Spot: Make minor 1/4-turn adjustments to the claw screws until the wedge block can slide out easily with no friction, and the guitar stays perfectly in tune. If the tuning shifts slightly when the block comes out, tweak the claw screws a fraction more until standard tuning and a level bridge profile coexist.
Step 5: Adjusting Action and the “Hidden” Locking Studs
If your strings are sitting too high off the fretboard, or if you are experiencing unwanted fret buzz, you need to adjust the bridge height. However, turning the post screws blindly can permanently damage an Edge tremolo.
Factory Standard Action Heights and my favorite
When measuring from the top of the 14th fret wire to the bottom of the string, Ibanez factory specifications recommend the following setup:
Treble Side (High E String): 1.5 mm (approx. 4/64 inches)
Bass Side (Low E String): 2.0 mm (approx. 5/64 inches)
Note: Shredders looking for an ultra-low action often push the treble side down to 1.2 mm and the bass side to 1.7 mm, but this requires exceptionally level frets to avoid dead notes during big string bends.
How to Make the Adjustment:
Original and Lo-Pro Edge bridges feature internal locking studs designed to maximize tuning stability. You must unlock them first before turning the main posts, or you will strip the threads:
Insert a tiny 1.5 mm hex wrench straight down into the center hole of the main 4 mm bridge anchor posts.
Turn counter-clockwise until you feel the tiny inner set-screw back away from the bottom of the cavity.
Once unlocked, insert your 4 mm hex wrench into the main posts. Turn clockwise to lower the bridge or counter-clockwise to raise it. Tweak both sides until you hit your target measurements at the 14th fret.
When you achieve your dream action height, insert the 1.5 mm wrench back into the posts and snug the inner set-screws clockwise until tight. This locks the bridge height securely into place.
Step 6: Intonation and Final Lock
The final step ensures your guitar plays accurately across the entire length of the neck.
Check the intonation by playing an open string, then playing the harmonic at the 12th fret, and finally pressing the note at the 12th fret.
If the fretted note is sharp compared to the harmonic, the saddle needs to move backward (away from the pickups). If it is flat, it needs to move forward.
To move a saddle, loosen its top locking screw with a 2 mm hex wrench, slide the saddle manually to its new position, and retighten.
Once intonation is flawless, clamp down the three headstock nut pads using your 3 mm wrench.
From this point forward, put your headstock tuners away. Any minor tuning variances caused by temperature or aggressive playing can be fixed effortlessly using the top-mounted fine tuners.
By mastering the blocking method and respecting the internal locking studs, your Ibanez Edge will reward you with unparalleled dive-bombing freedom and bulletproof tuning stability for years to come.